What is TikTok Effect House
TikTok Effect House is the official AR effect creation tool provided by TikTok. You can build and publish the kinds of effects you often see on TikTok yourself, such as filters overlaid on your face or effects that react to your expressions.
You use it from a desktop app on Windows and Mac, and it’s free. Its distinguishing feature is that you can turn an effect into reality just by combining the provided parts, even without specialized 3D development knowledge.
In this article, I’ll cover just the surface of visual programming, the mechanism within Effect House for adding motion.
What is visual programming
Visual programming is a method where, instead of writing code as text, you assemble the flow of processing by connecting boxes called nodes with lines. Elements you write in code, like “when (events),” “what to remember (variables),” and “under what conditions (conditional branching),” are each provided as nodes.
In Effect House, this mechanism is called visual scripting. You can also write the same processing in TypeScript code, so in this article I’ll look at both approaches.
As a subject, let me implement an effect that detects opening and closing the mouth to turn a Filter on and off.
Preparation before trying it out
First, get the app from the official site.
 https://effecthouse.tiktok.com/
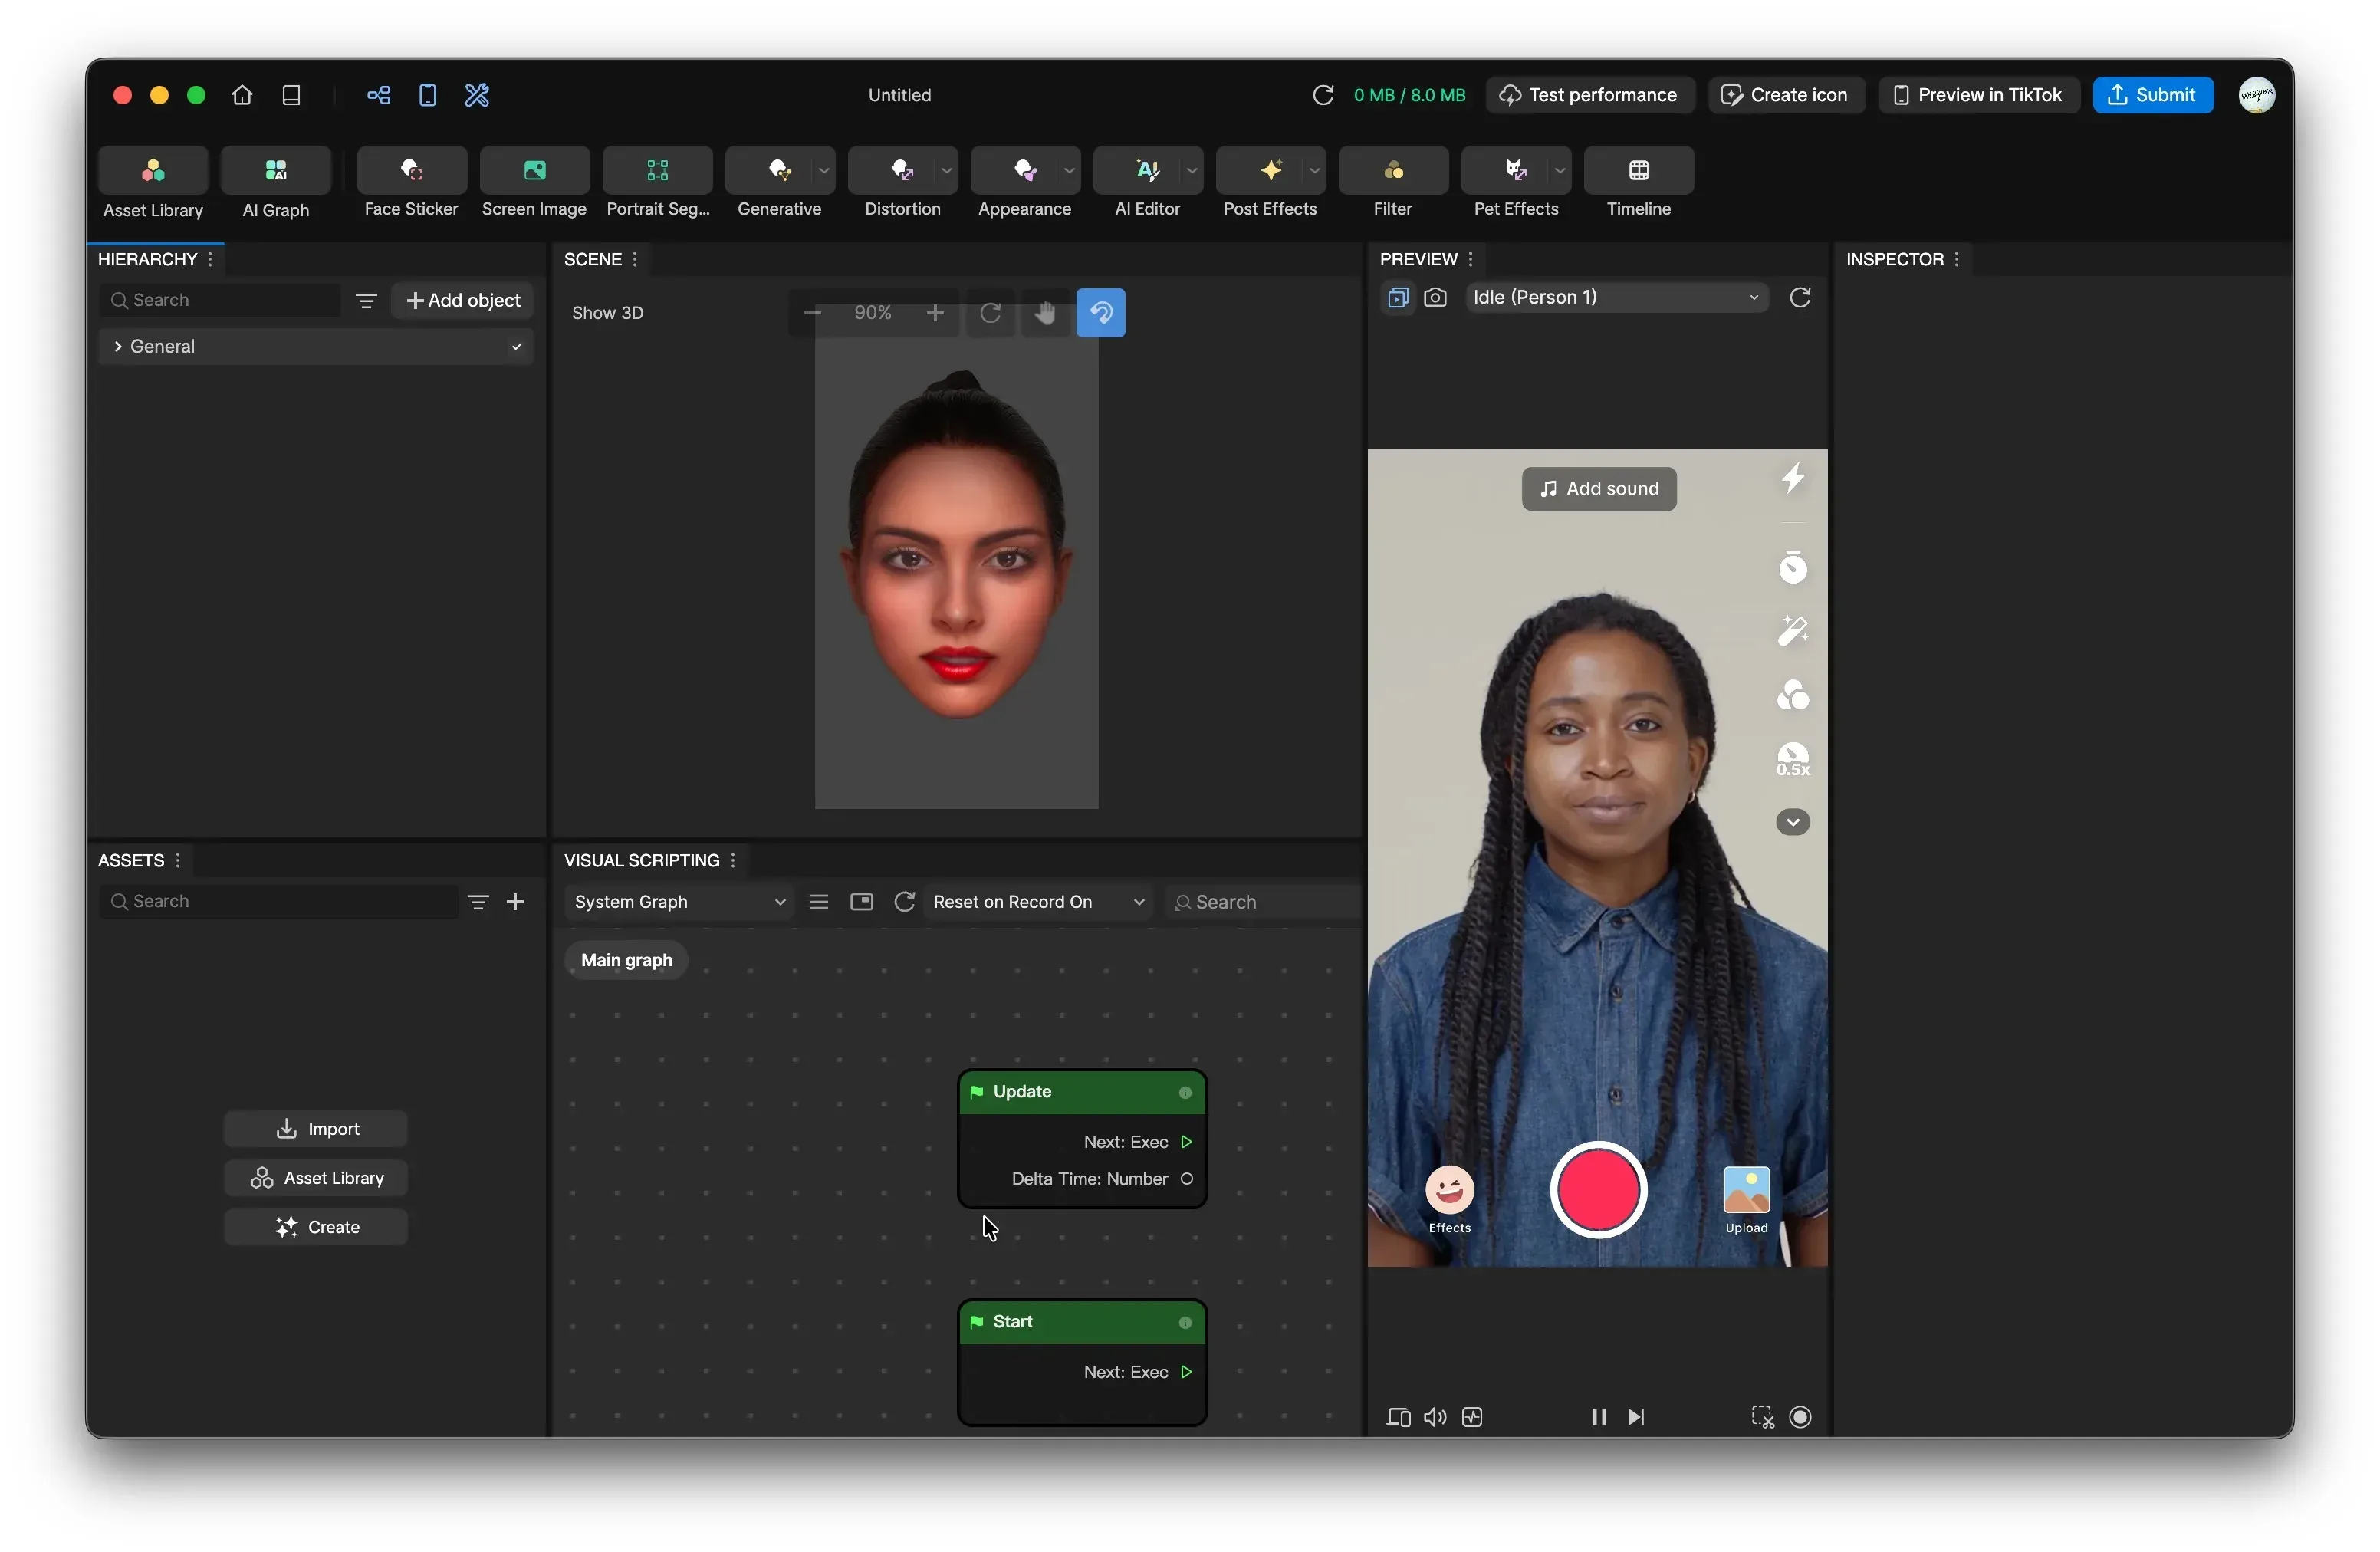
Download it from the official site and launch it. You’re ready once a screen like the image below appears.
Building it with visual scripting
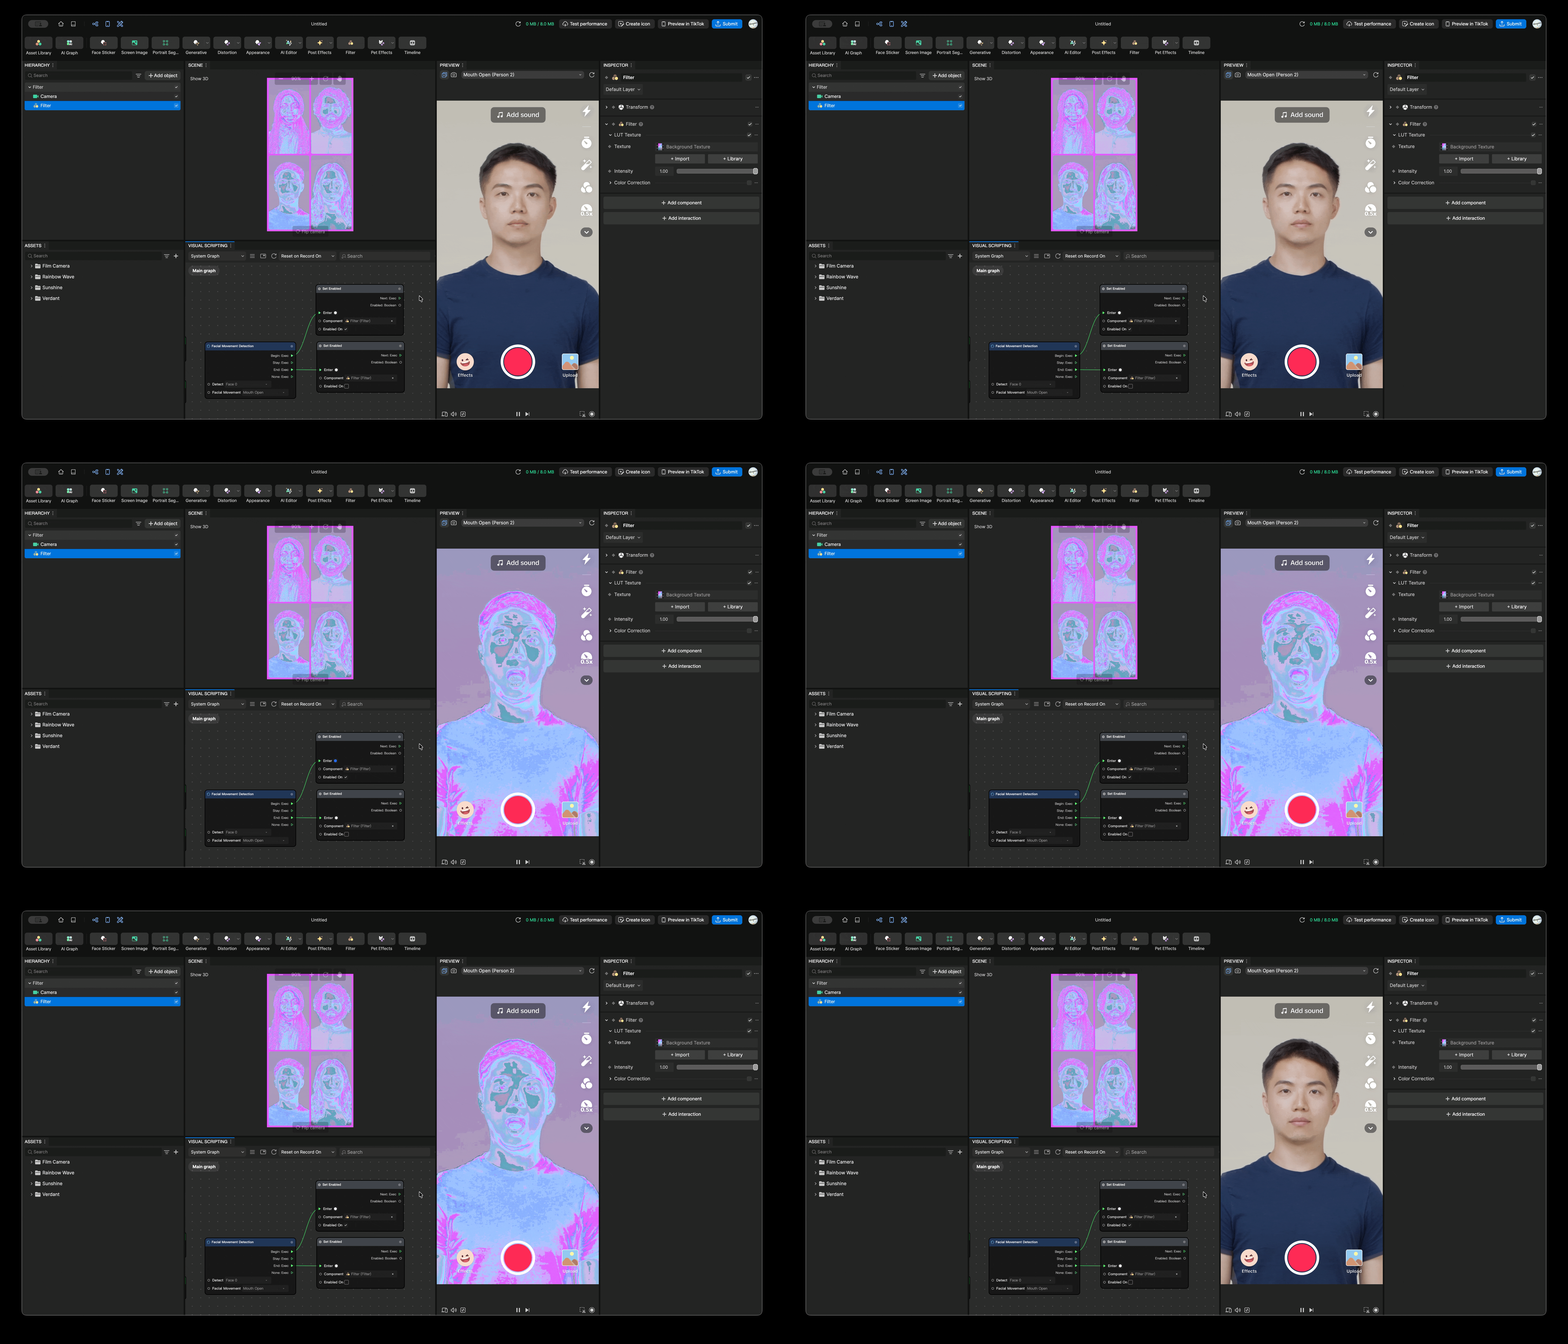
Ultimately, I’ll create a sample that detects opening and closing the mouth and applies a Filter. Here’s what the finished result looks like.
Prepare a Filter
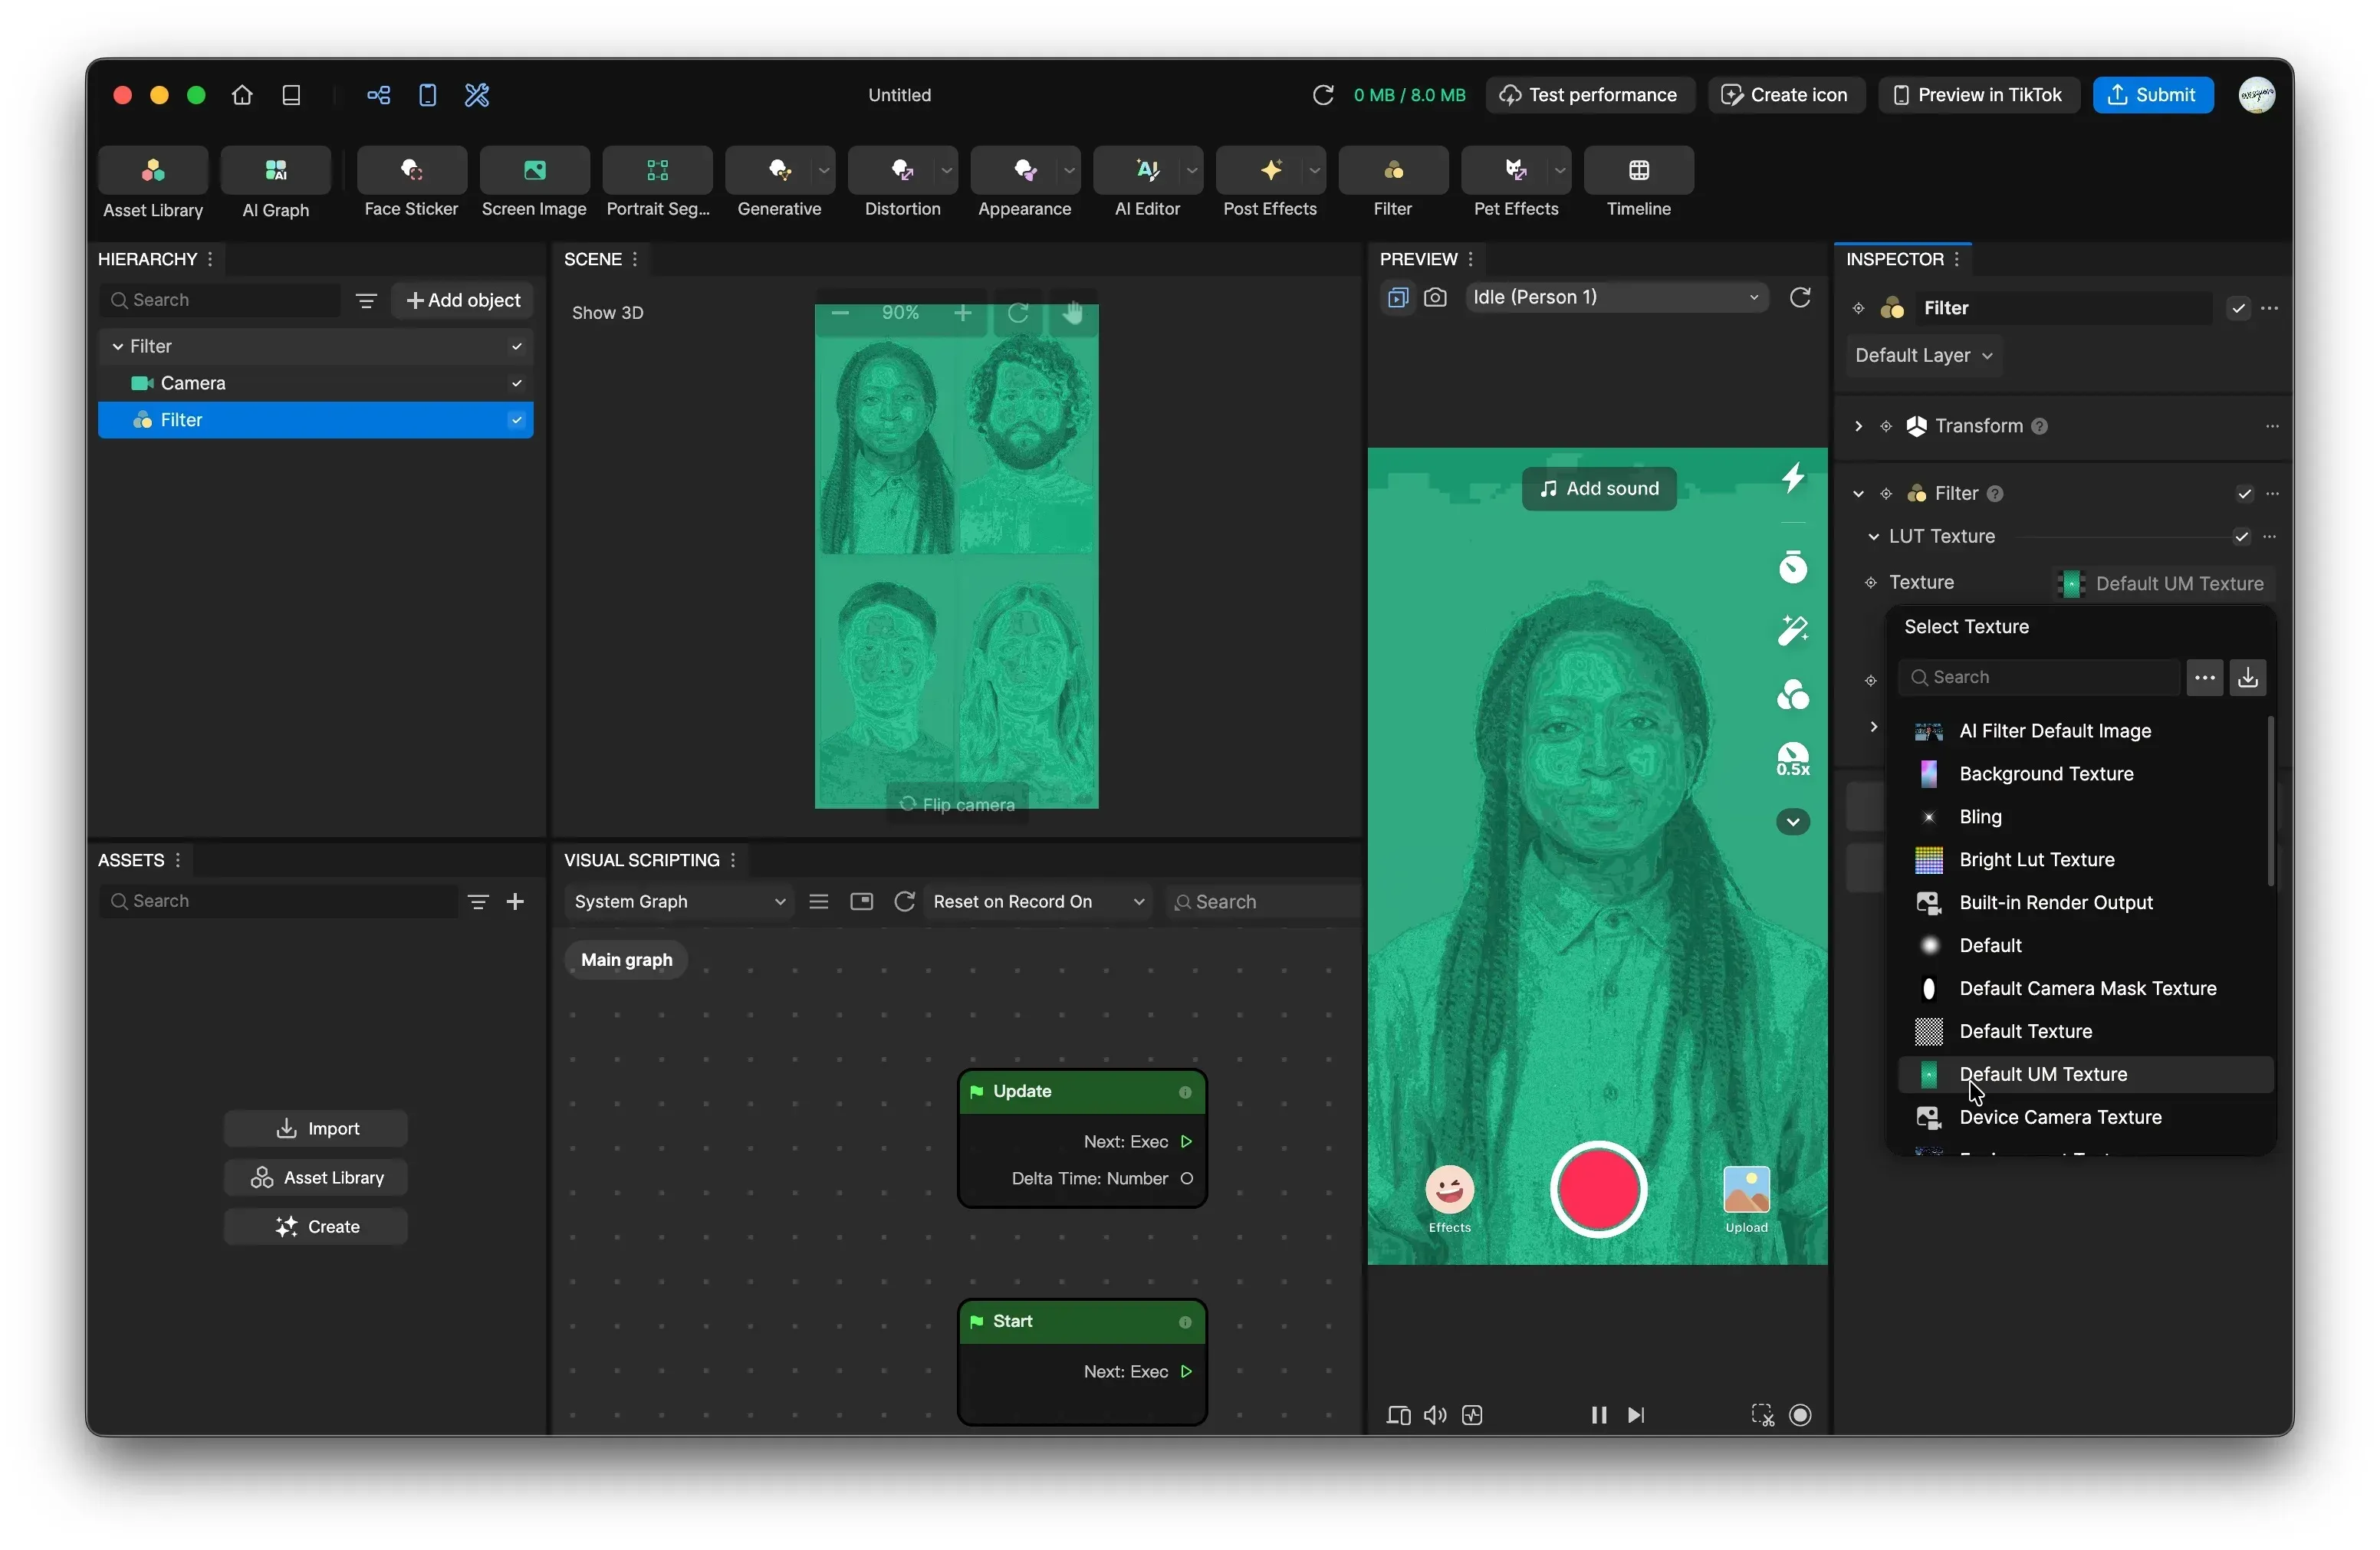
First, select “Filter” from the menu of icons lined up at the top. You’ll get the screen below. From “Texture” in the INSPECTOR on the right, you can choose from various effects. This time I used “Rainbow Wave.”
Build the nodes that detect opening and closing the mouth
From here I’ll use the VISUAL SCRIPTING tab. Right-click on an empty part of the panel and press Add node. Type mouth in the search box and add a “Mouth Open”-type node. Right-click again, search for set enabled (or set visible), and add it.
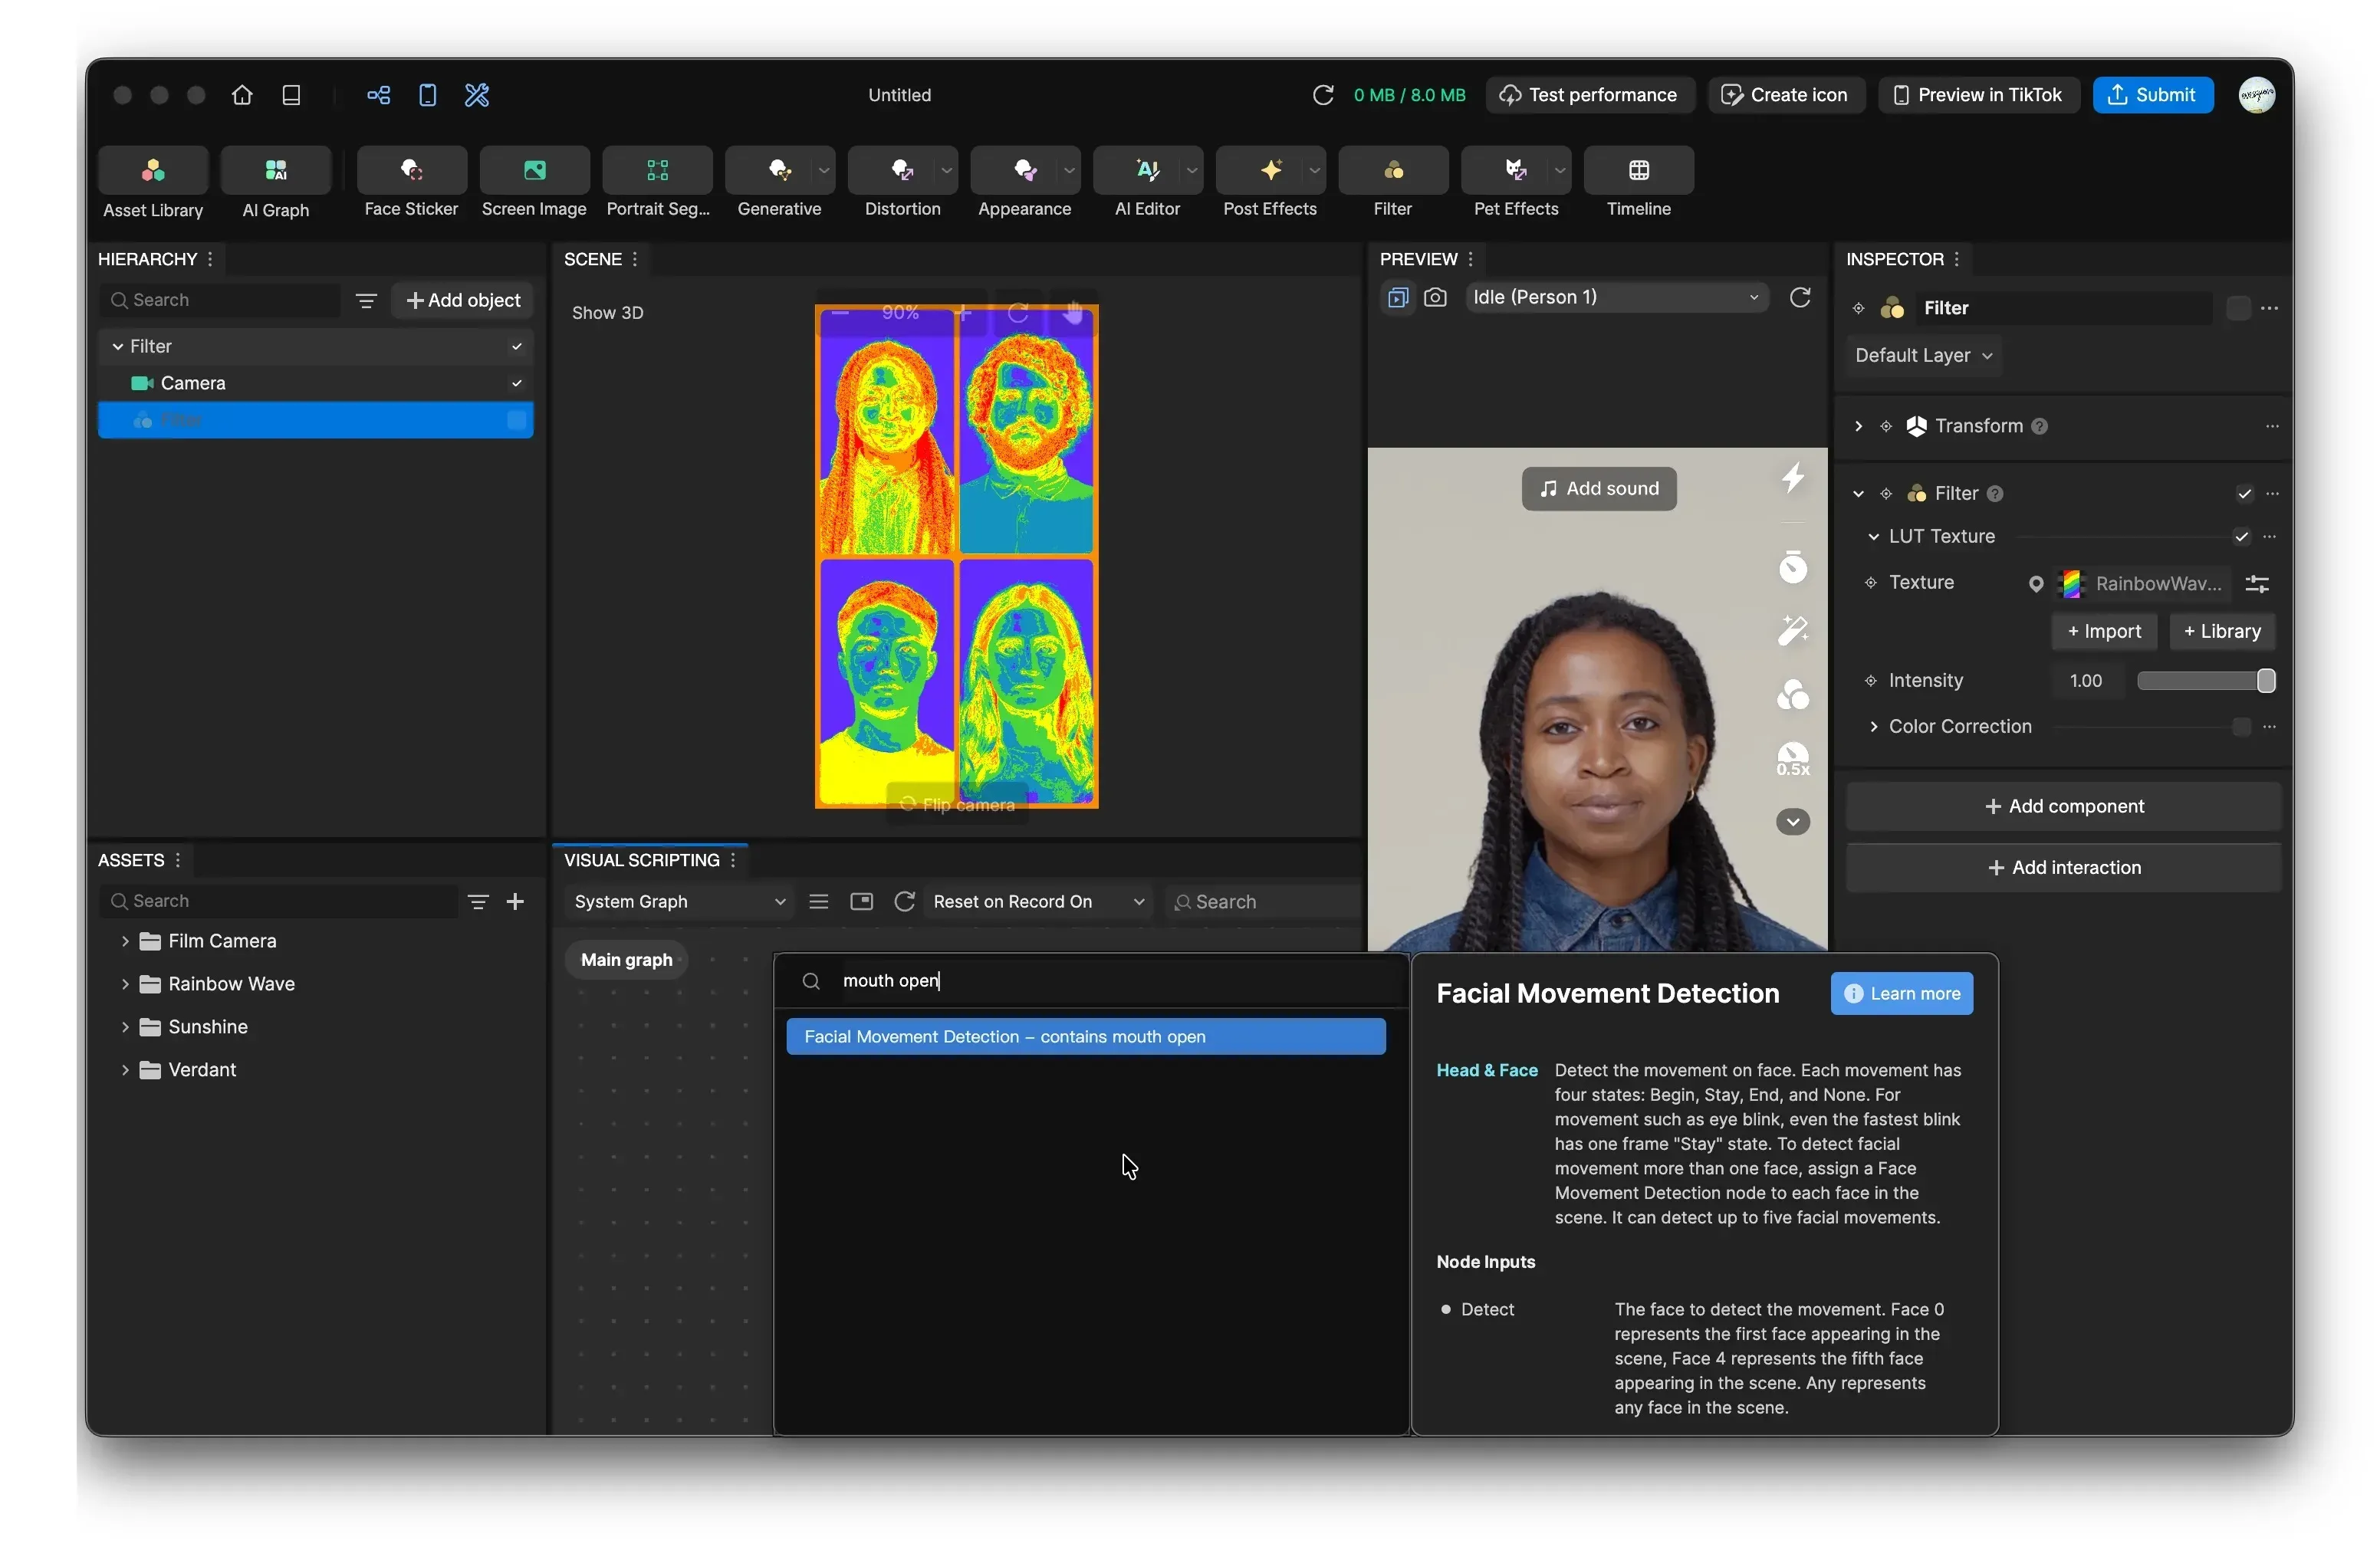
Once placement is done, connect the nodes.
- Begin: Exec → Enter of the Set Enabled node with Enabled On set to On
- End: Exec → Enter of the Set Enabled node with Enabled On set to Off
- Set Enabled node’s Component → specify Filter
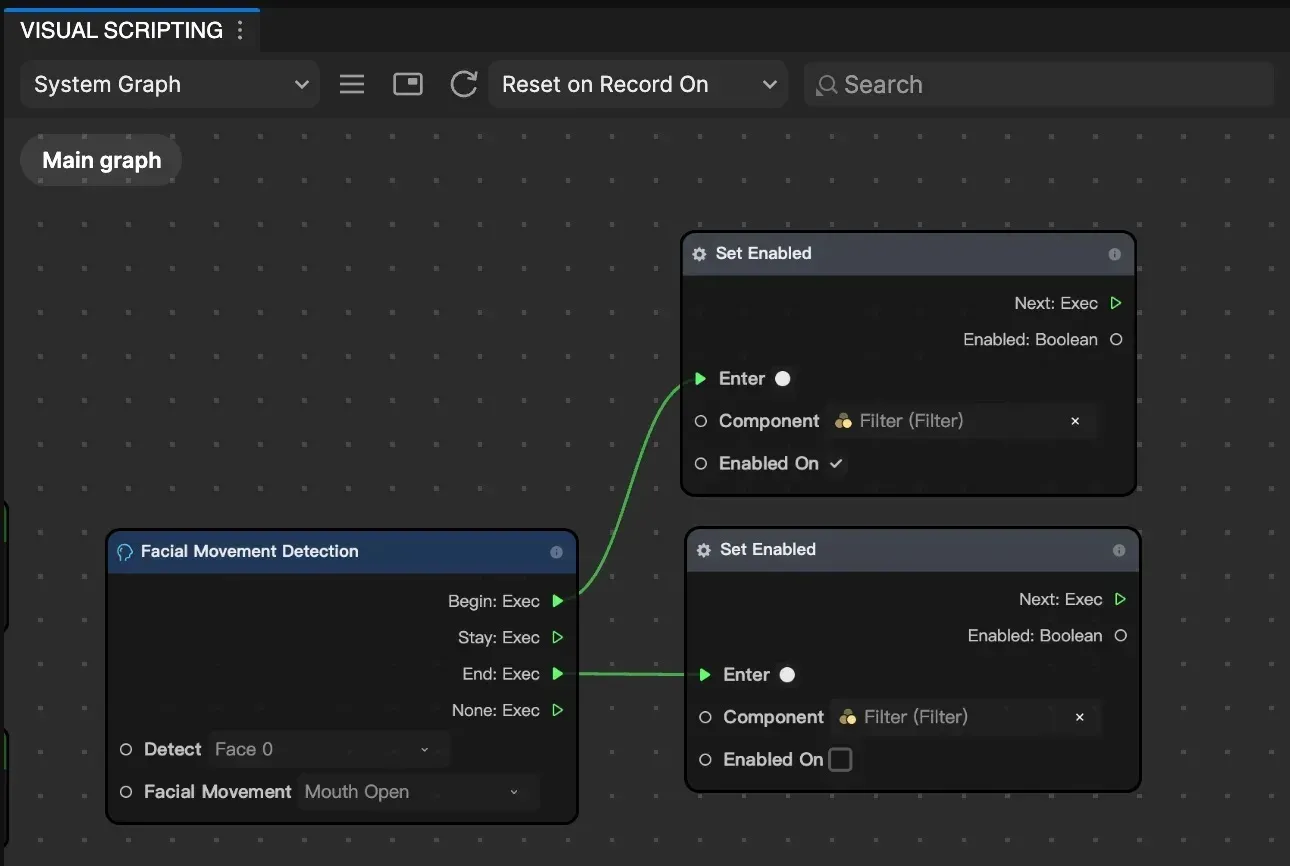
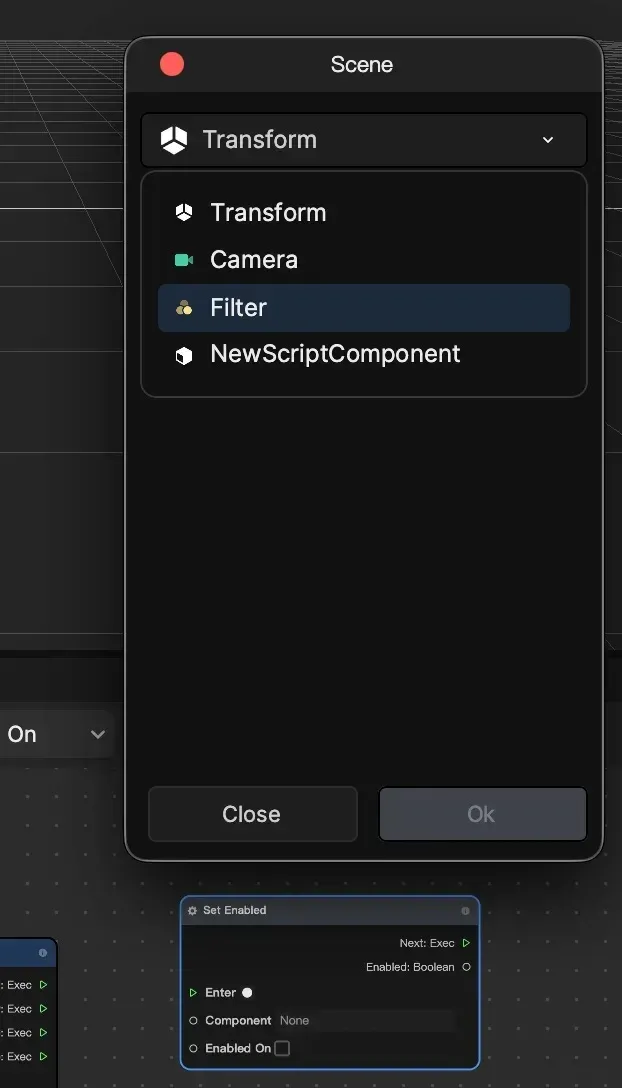
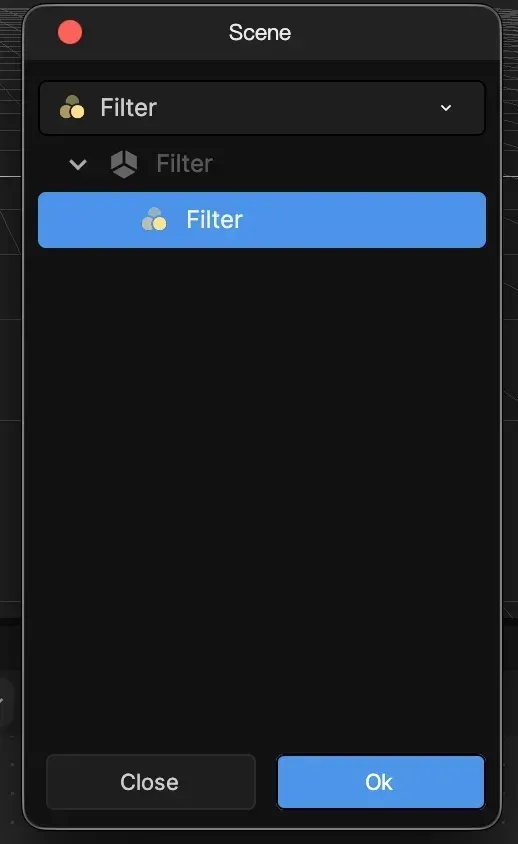
When you select Component, a scene selection window opens. Here, select Filter rather than Transform, then choose Filter.
 |  |
|---|---|
| Click the “None” part of Component to open the scene selection window. | Select Filter from the dropdown at the top of the scene selection window, then select the Filter within the hierarchical structure. |
Now you have an effect where the Filter is enabled only while your mouth is open.
Controlling it with TypeScript
The Filter toggling I just built with visual scripting can also be achieved with TypeScript code. Here, instead of jumping straight to the finished form, I’ll work up to the same behavior step by step starting from Hello, World!. First, create a script.
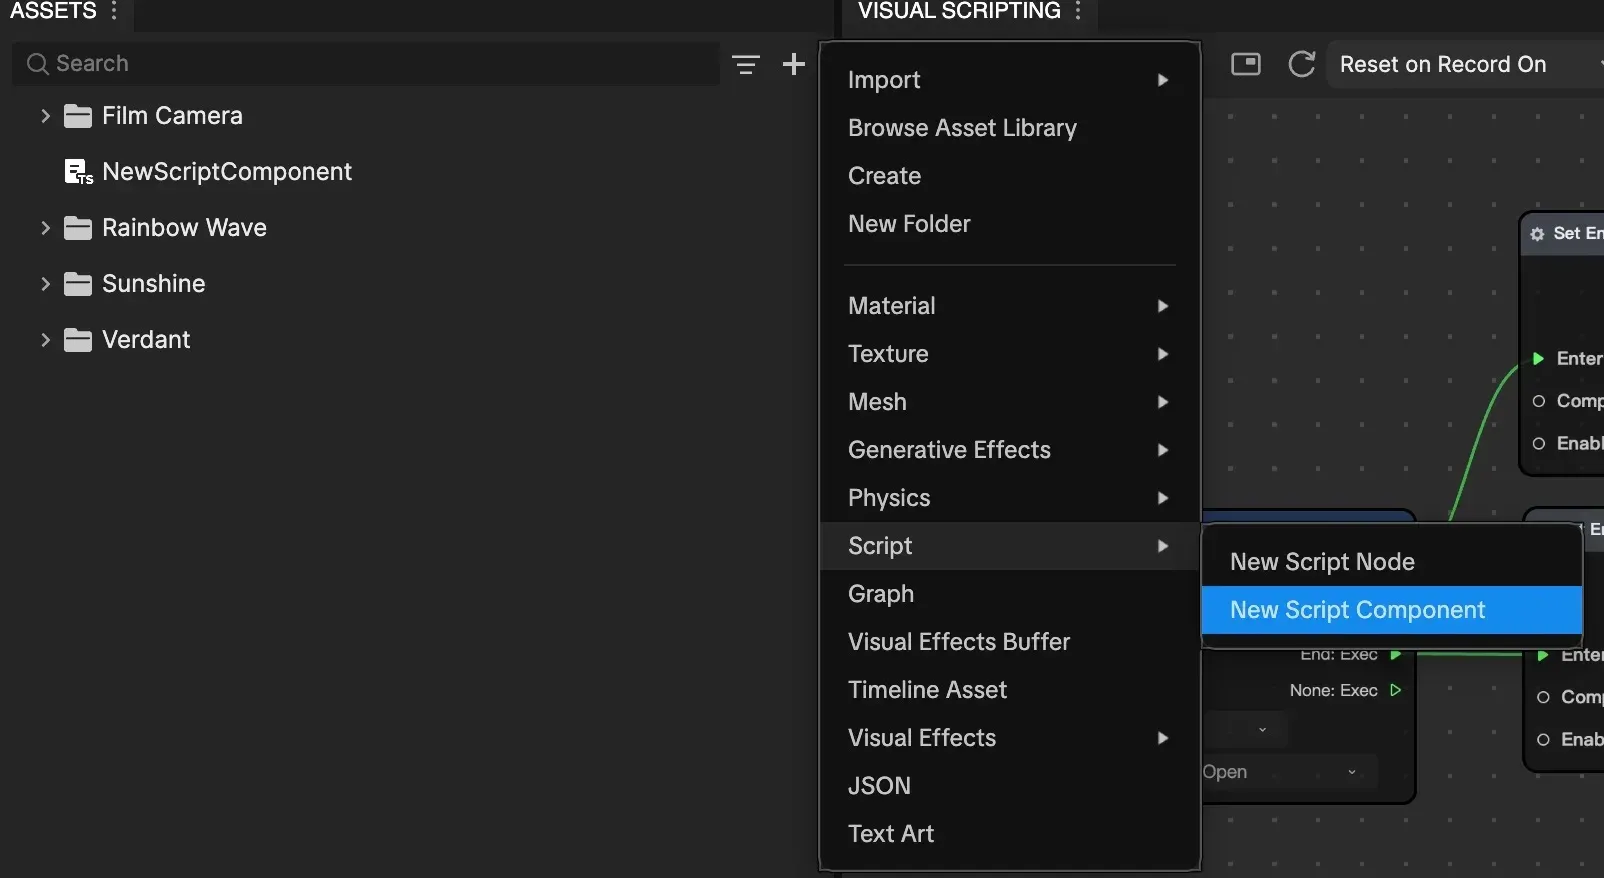
Opening the script launches the code editor.
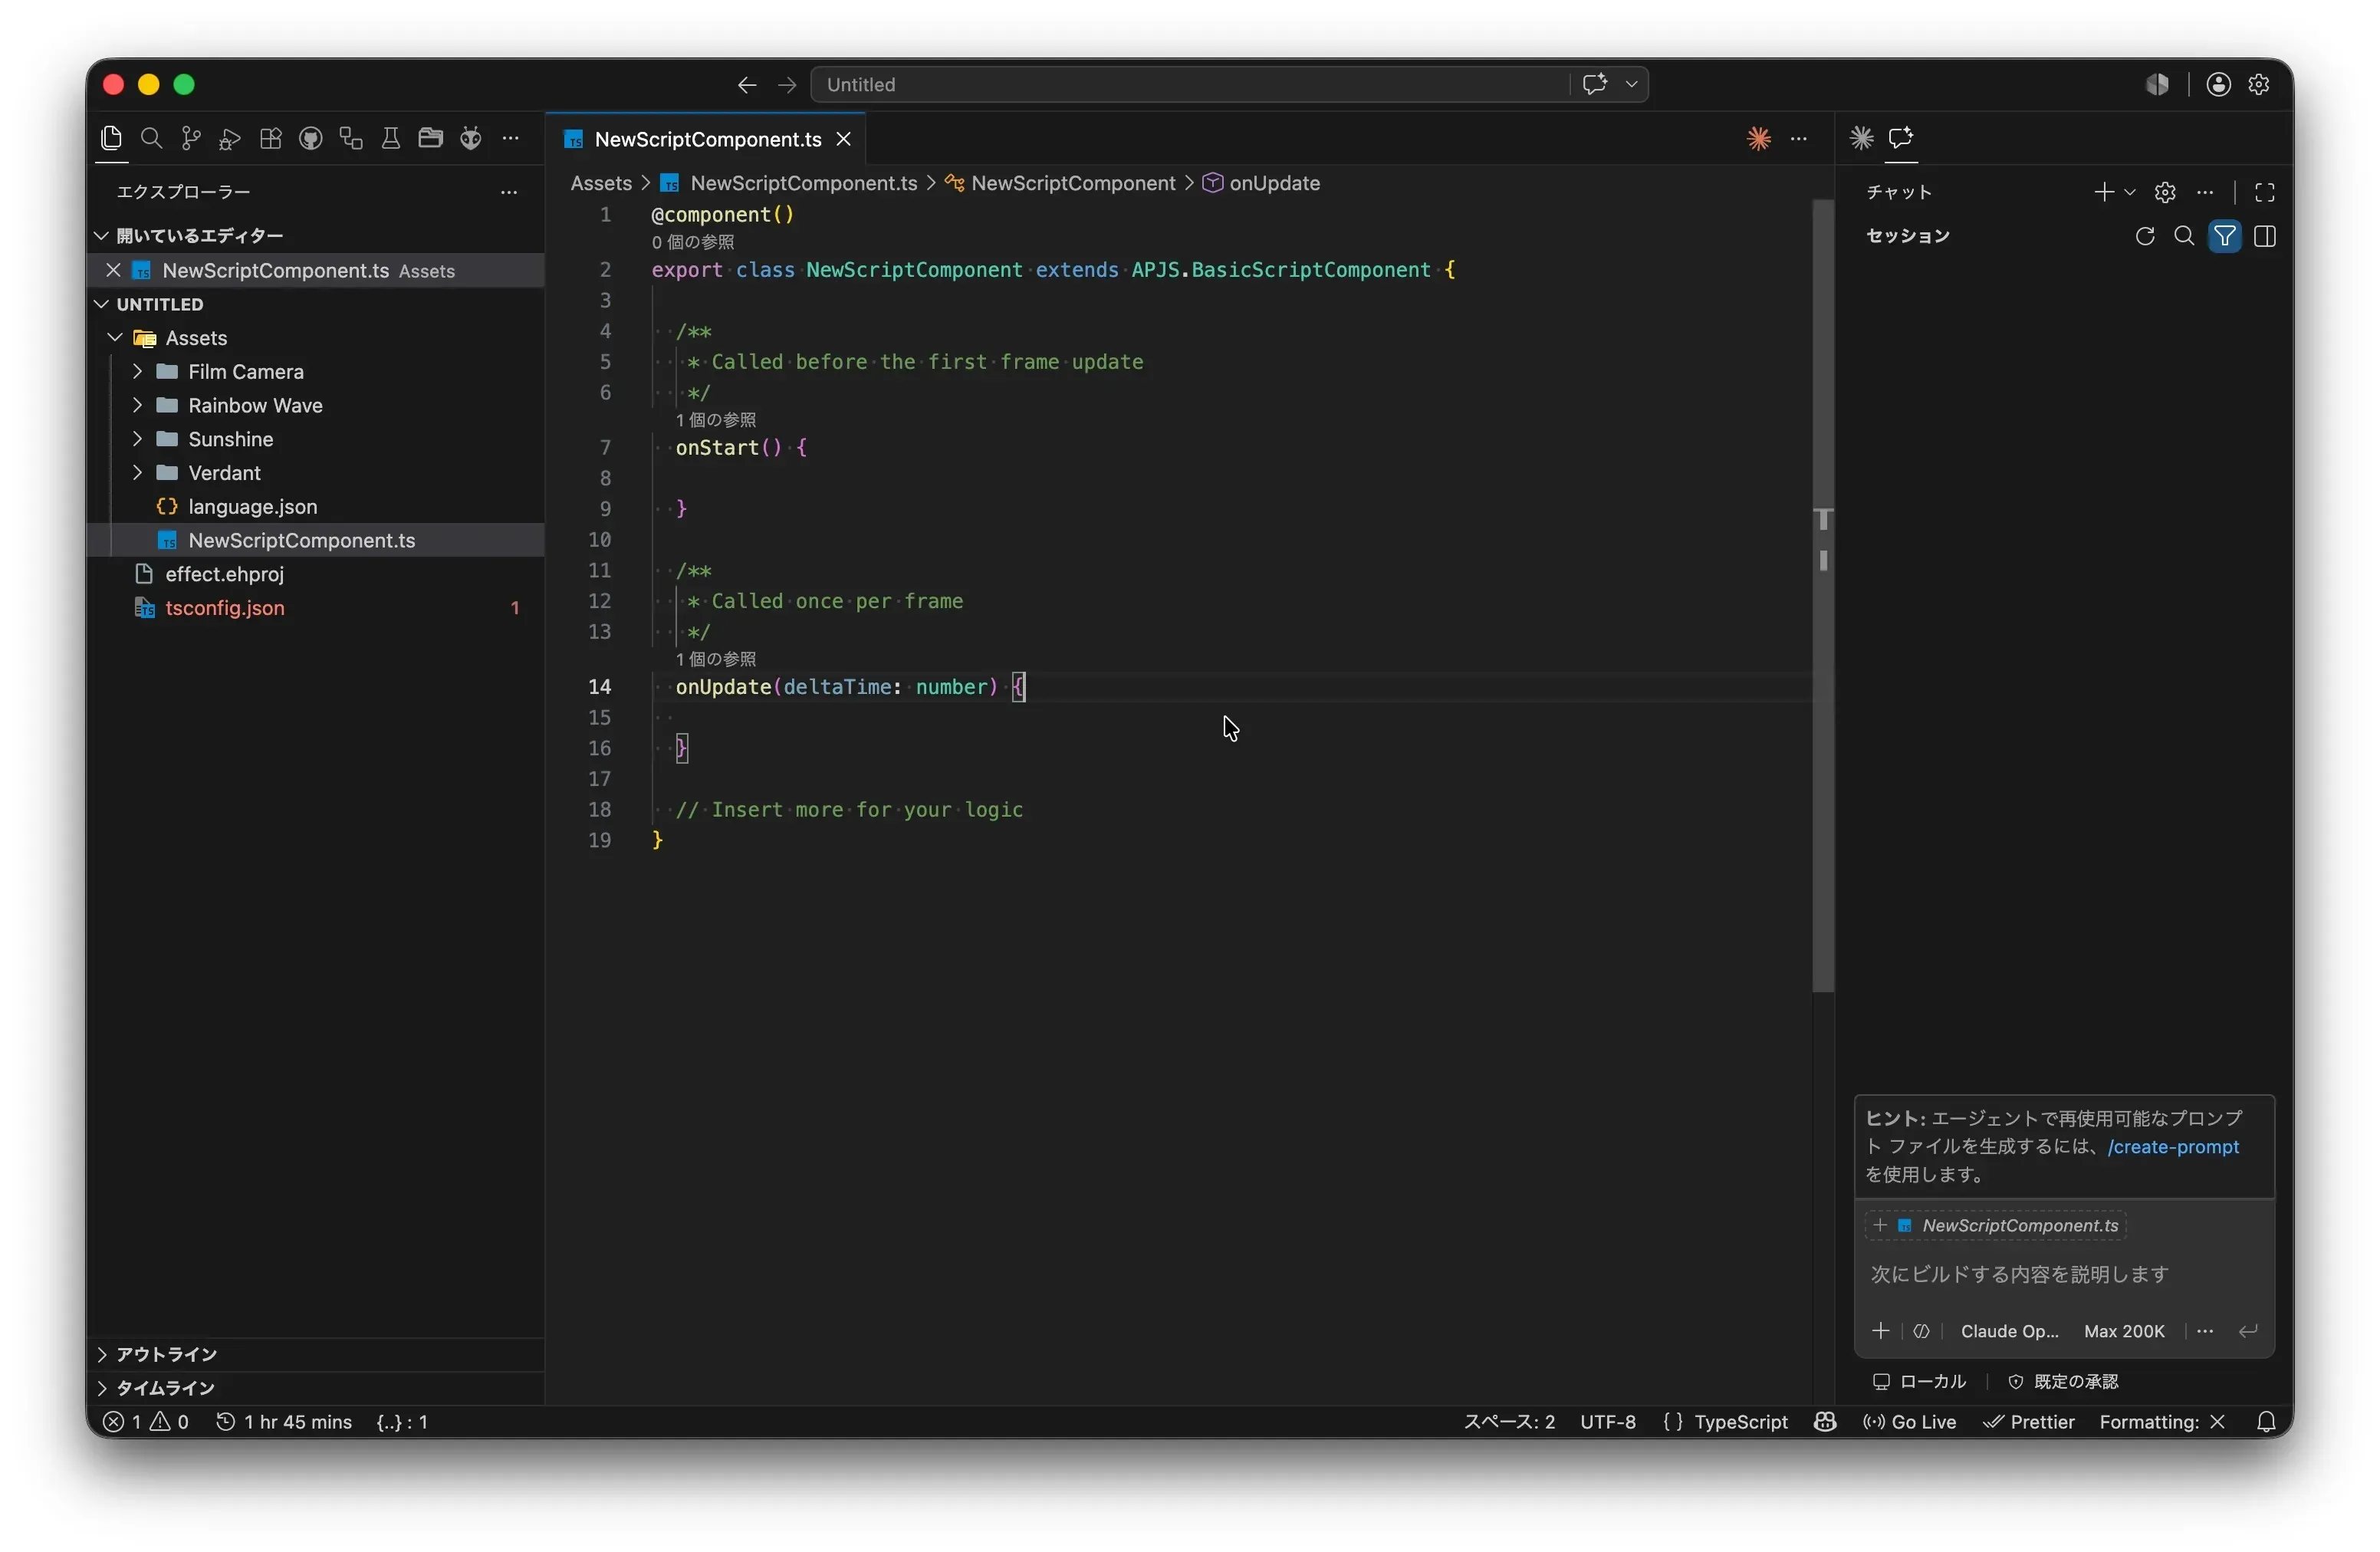
⌘+S saves and immediately applies to the preview. Since you can check the result right away while writing code, you can proceed while testing behavior.
Hello, World!
First, partly as a sanity check, let me output a log at launch.
@component()
export class NewScriptComponent extends APJS.BasicScriptComponent {

  /**
   * Called before the first frame update
   */
  onStart() {
    console.log("Hello, World!🎉");
  }

  /**
   * Called once per frame
   */
  onUpdate(deltaTime: number) {

  }

  // Insert more for your logic
}
onStart is called once when the effect starts. When you save, it outputs to the log.
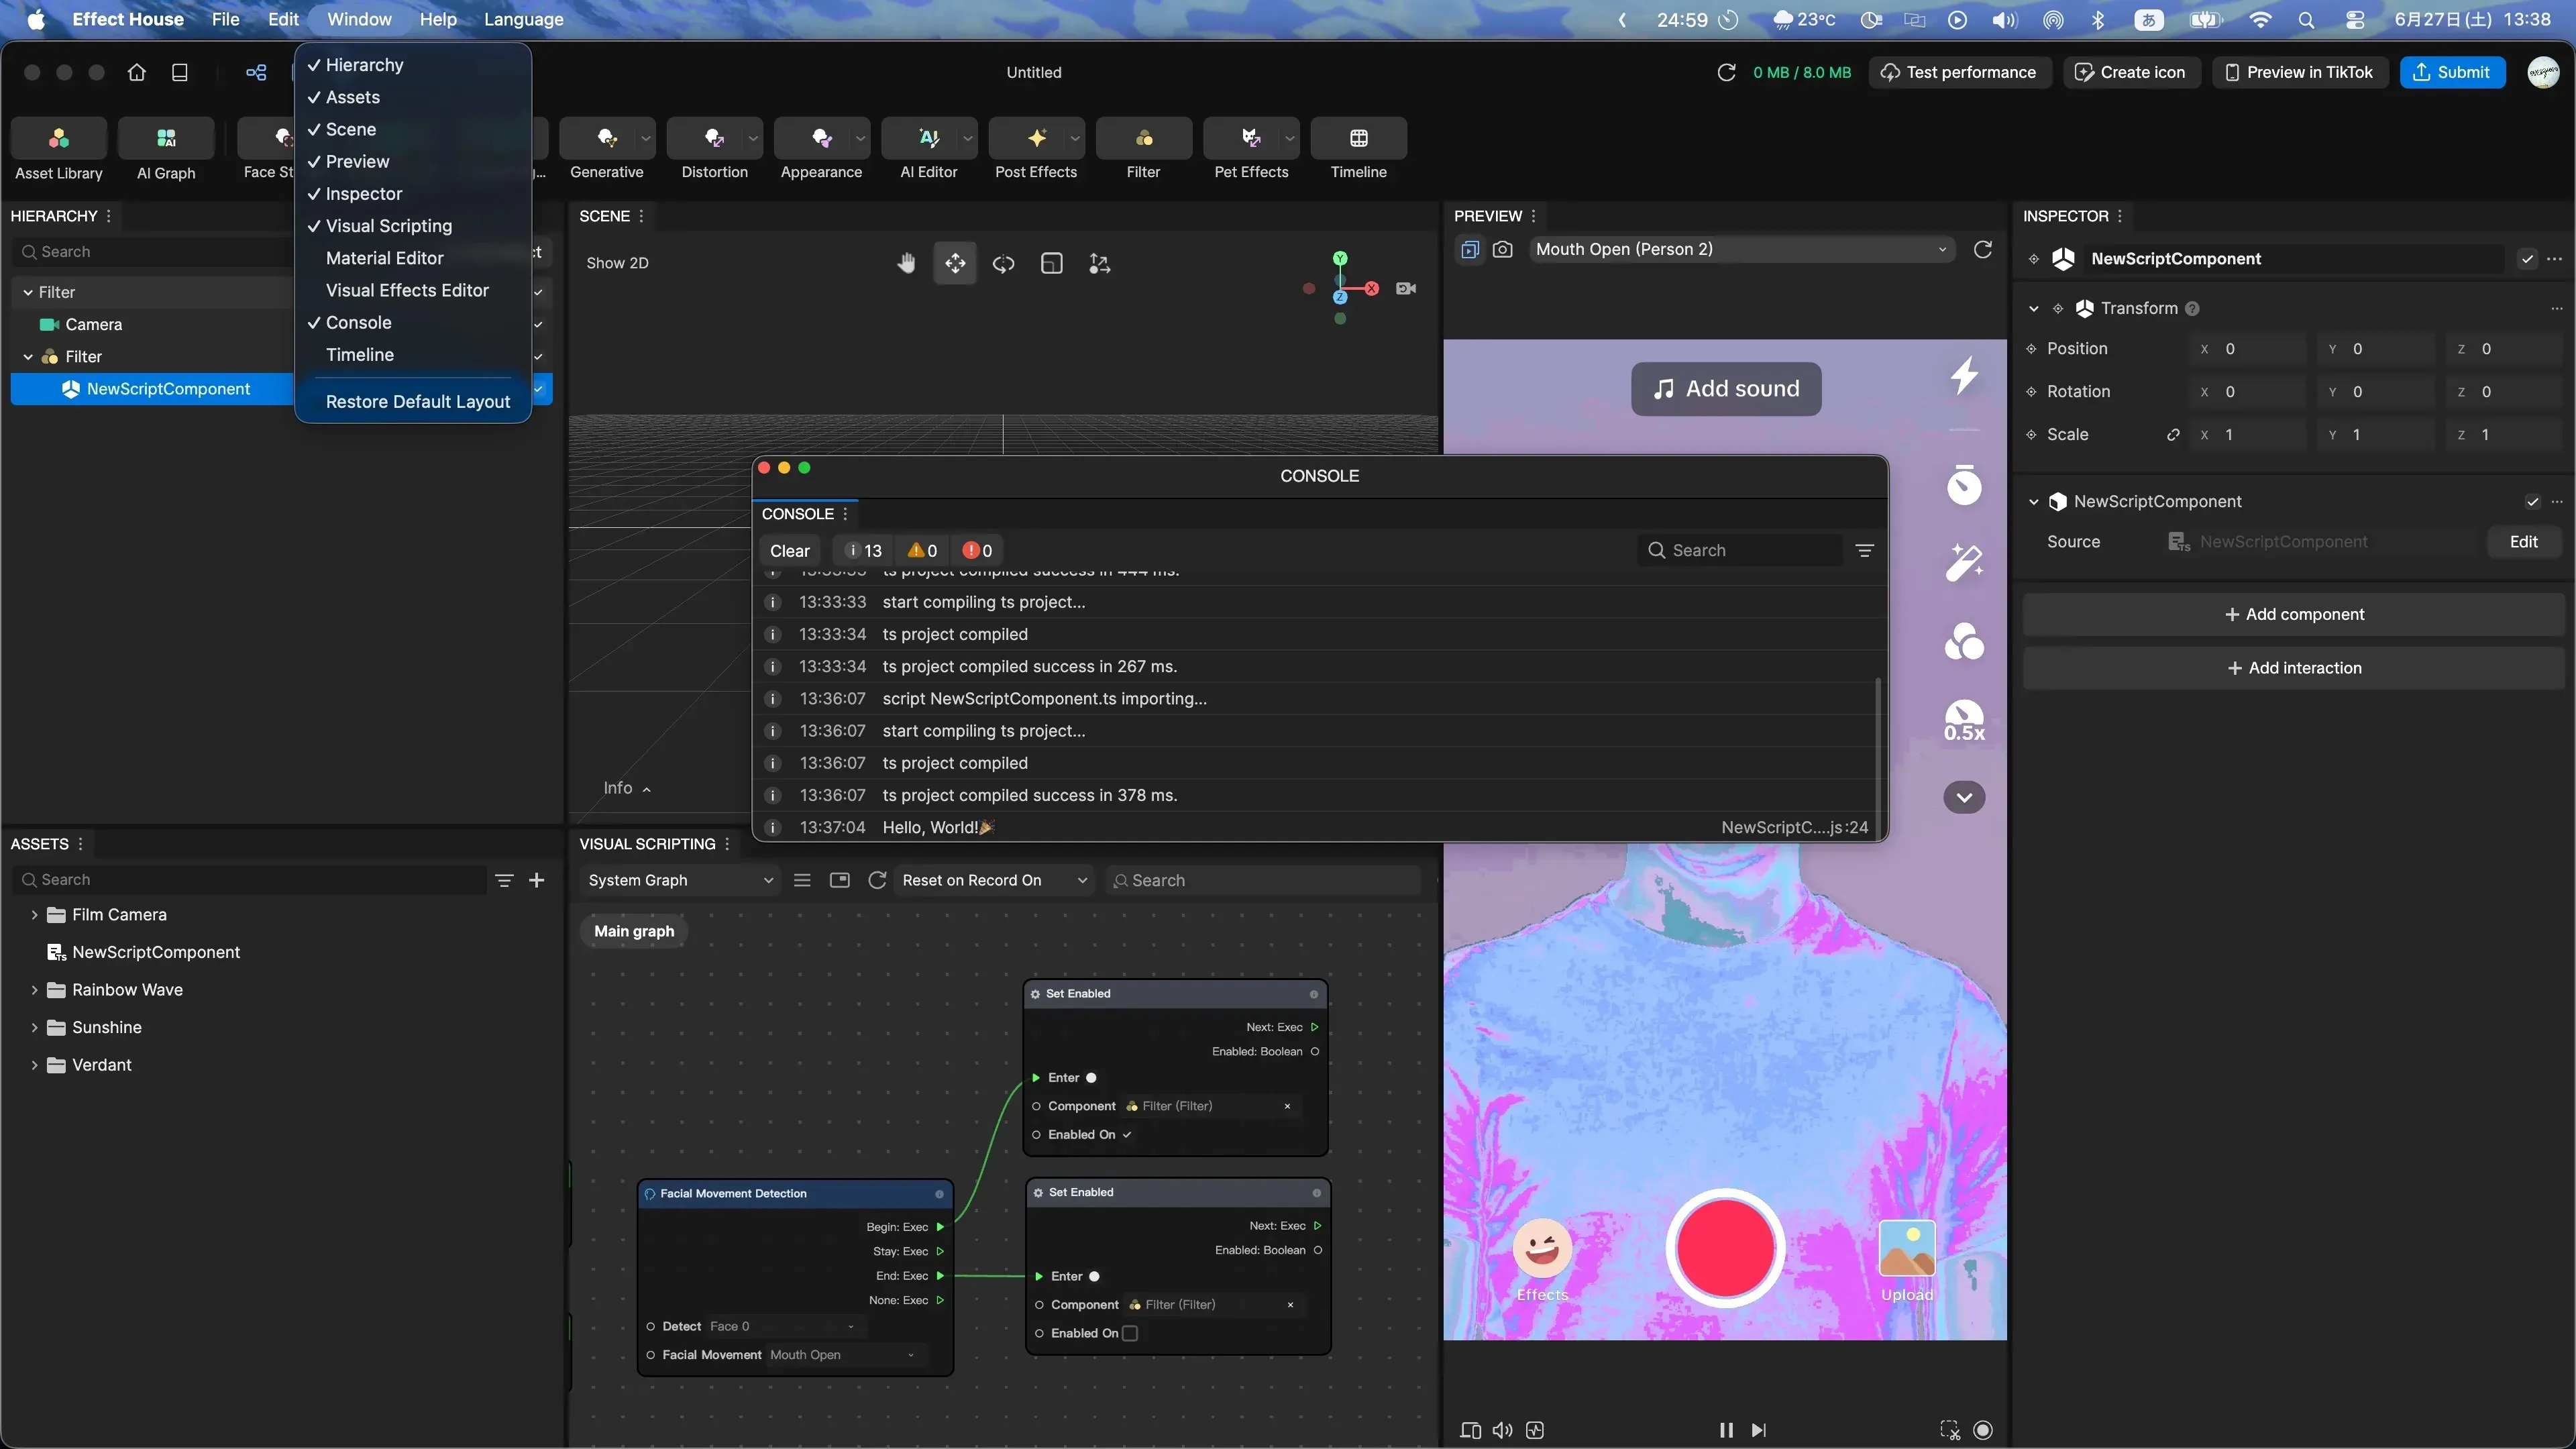
Try outputting a log every second
Next, using onUpdate, which is called every frame, let me output a log every second.
@component()
export class NewScriptComponent extends APJS.BasicScriptComponent {

  // Variables (boxes that remember numbers)
  private elapsed: number = 0;  // Total elapsed time
  private count: number = 0;    // Number of seconds counted

  onStart() {
    console.log("Start! Beginning the count");
  }

  onUpdate(deltaTime: number) {
    // deltaTime = seconds elapsed since the previous frame. Keep adding it each time
    this.elapsed += deltaTime;

    // Once the total exceeds 1 second...
    if (this.elapsed >= 1) {
      this.elapsed -= 1;       // Subtract 1 second's worth
      this.count += 1;         // Increase the count by 1
      console.log(this.count + " seconds elapsed");
    }
  }
}
The deltaTime argument of onUpdate holds the number of seconds elapsed since the previous frame. By continuously adding this and outputting a log at the moment it exceeds 1 second, I achieve a count every second.
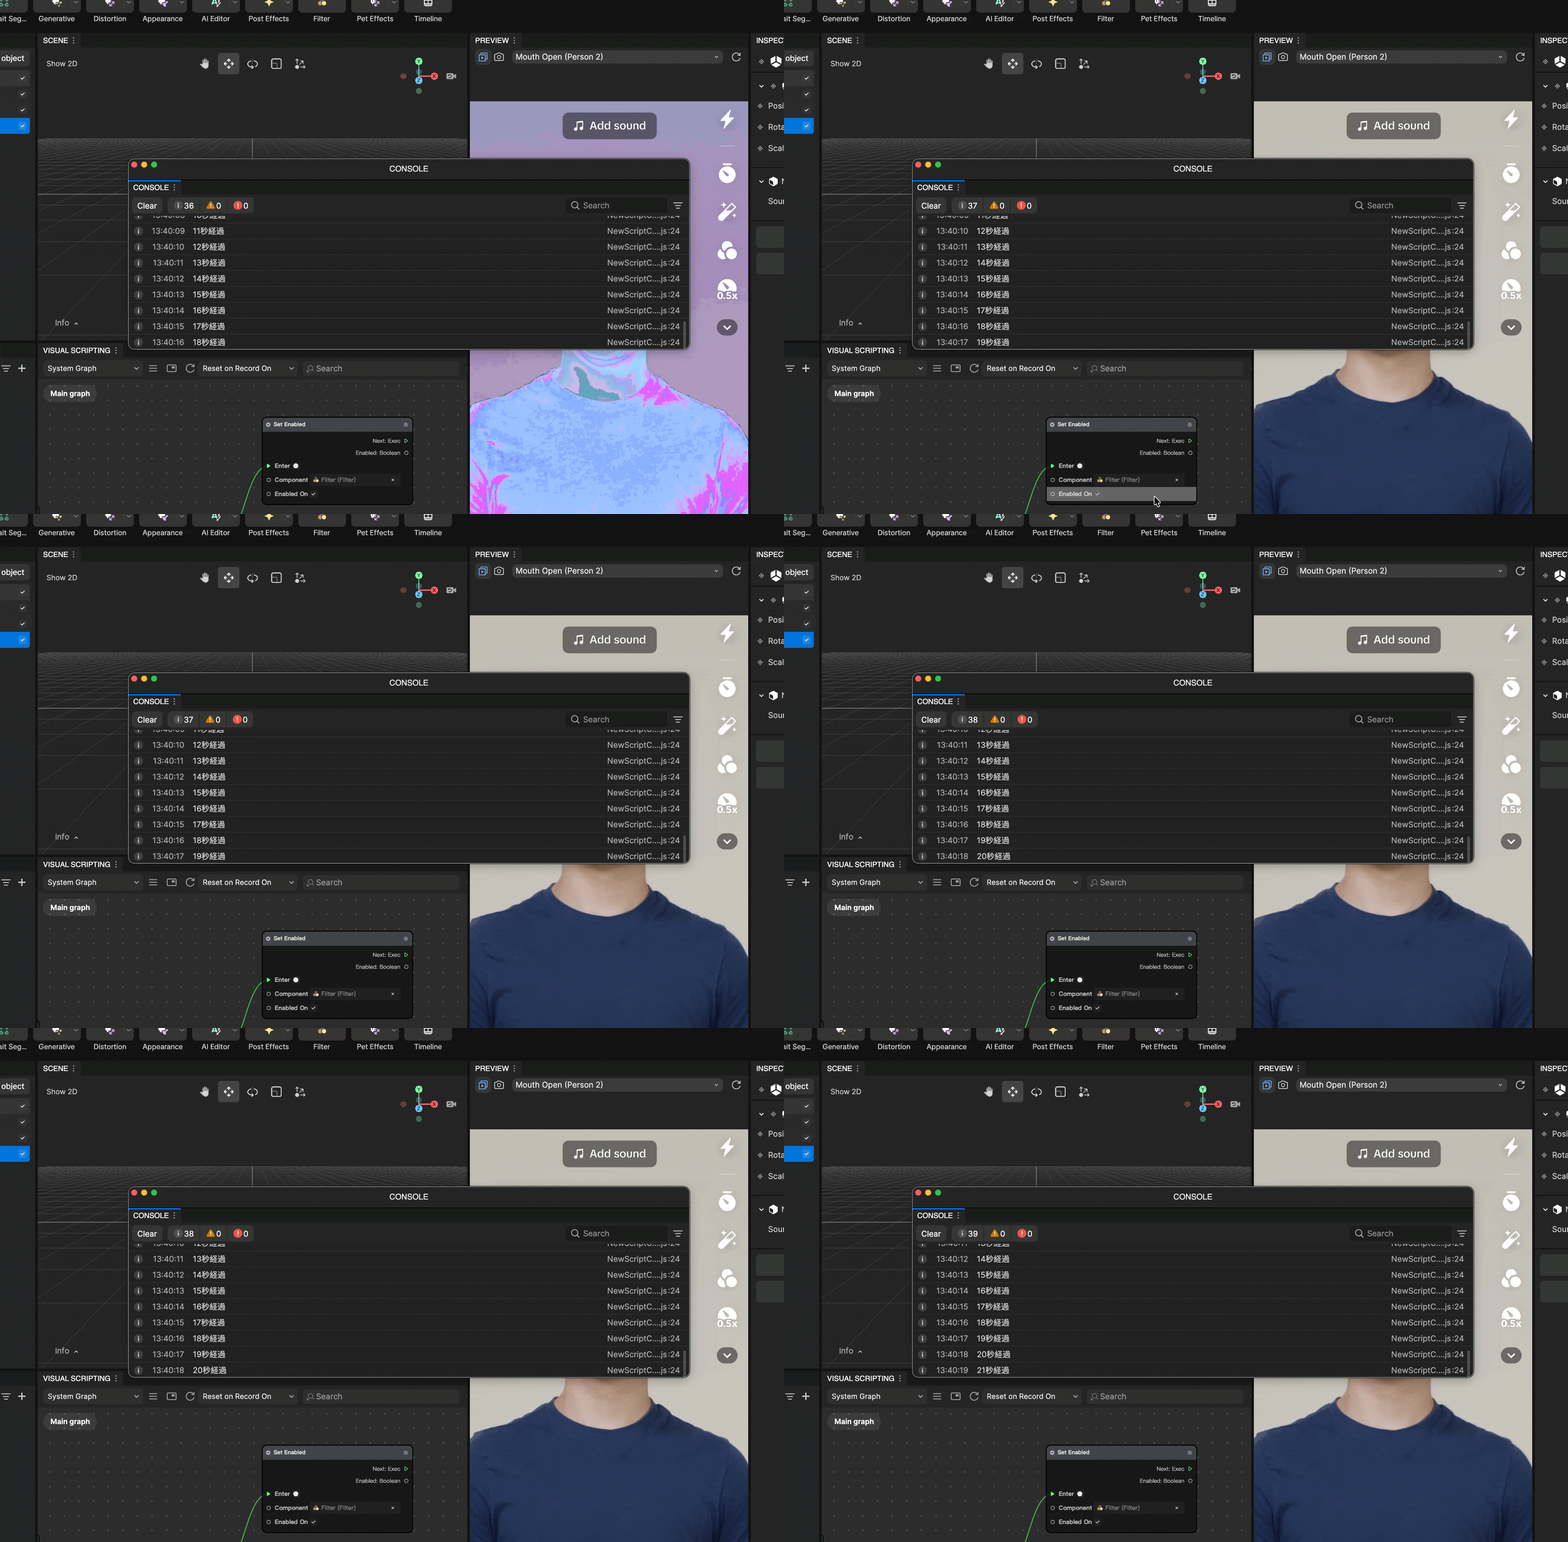
Try turning the Filter on and off every second
Finally, let me also write the Filter toggling I built with visual scripting in code.
@component()
export class NewScriptComponent extends APJS.BasicScriptComponent {

  private targetFilter: APJS.SceneObject | null = null;
  private elapsed: number = 0;
  private isOn: boolean = true;

  onStart() {
    const filterSceneObj = this.getSceneObject().parent;
    this.targetFilter = filterSceneObj;
  }

  onUpdate(deltaTime: number) {
    if (!this.targetFilter) return;

    this.elapsed += deltaTime;
    if (this.elapsed >= 1) {
      this.elapsed -= 1;
      this.isOn = !this.isOn;
      this.targetFilter.enabled = this.isOn;
      console.log("Filter: " + this.isOn);
    }
  }
}
Here I’m assuming the script is placed as a child object of the Filter. I trace the parent with getSceneObject().parent to get the target Filter. After that, I just toggle enabled every second, which is like doing the same thing as the Set Enabled node in visual scripting, but in code.
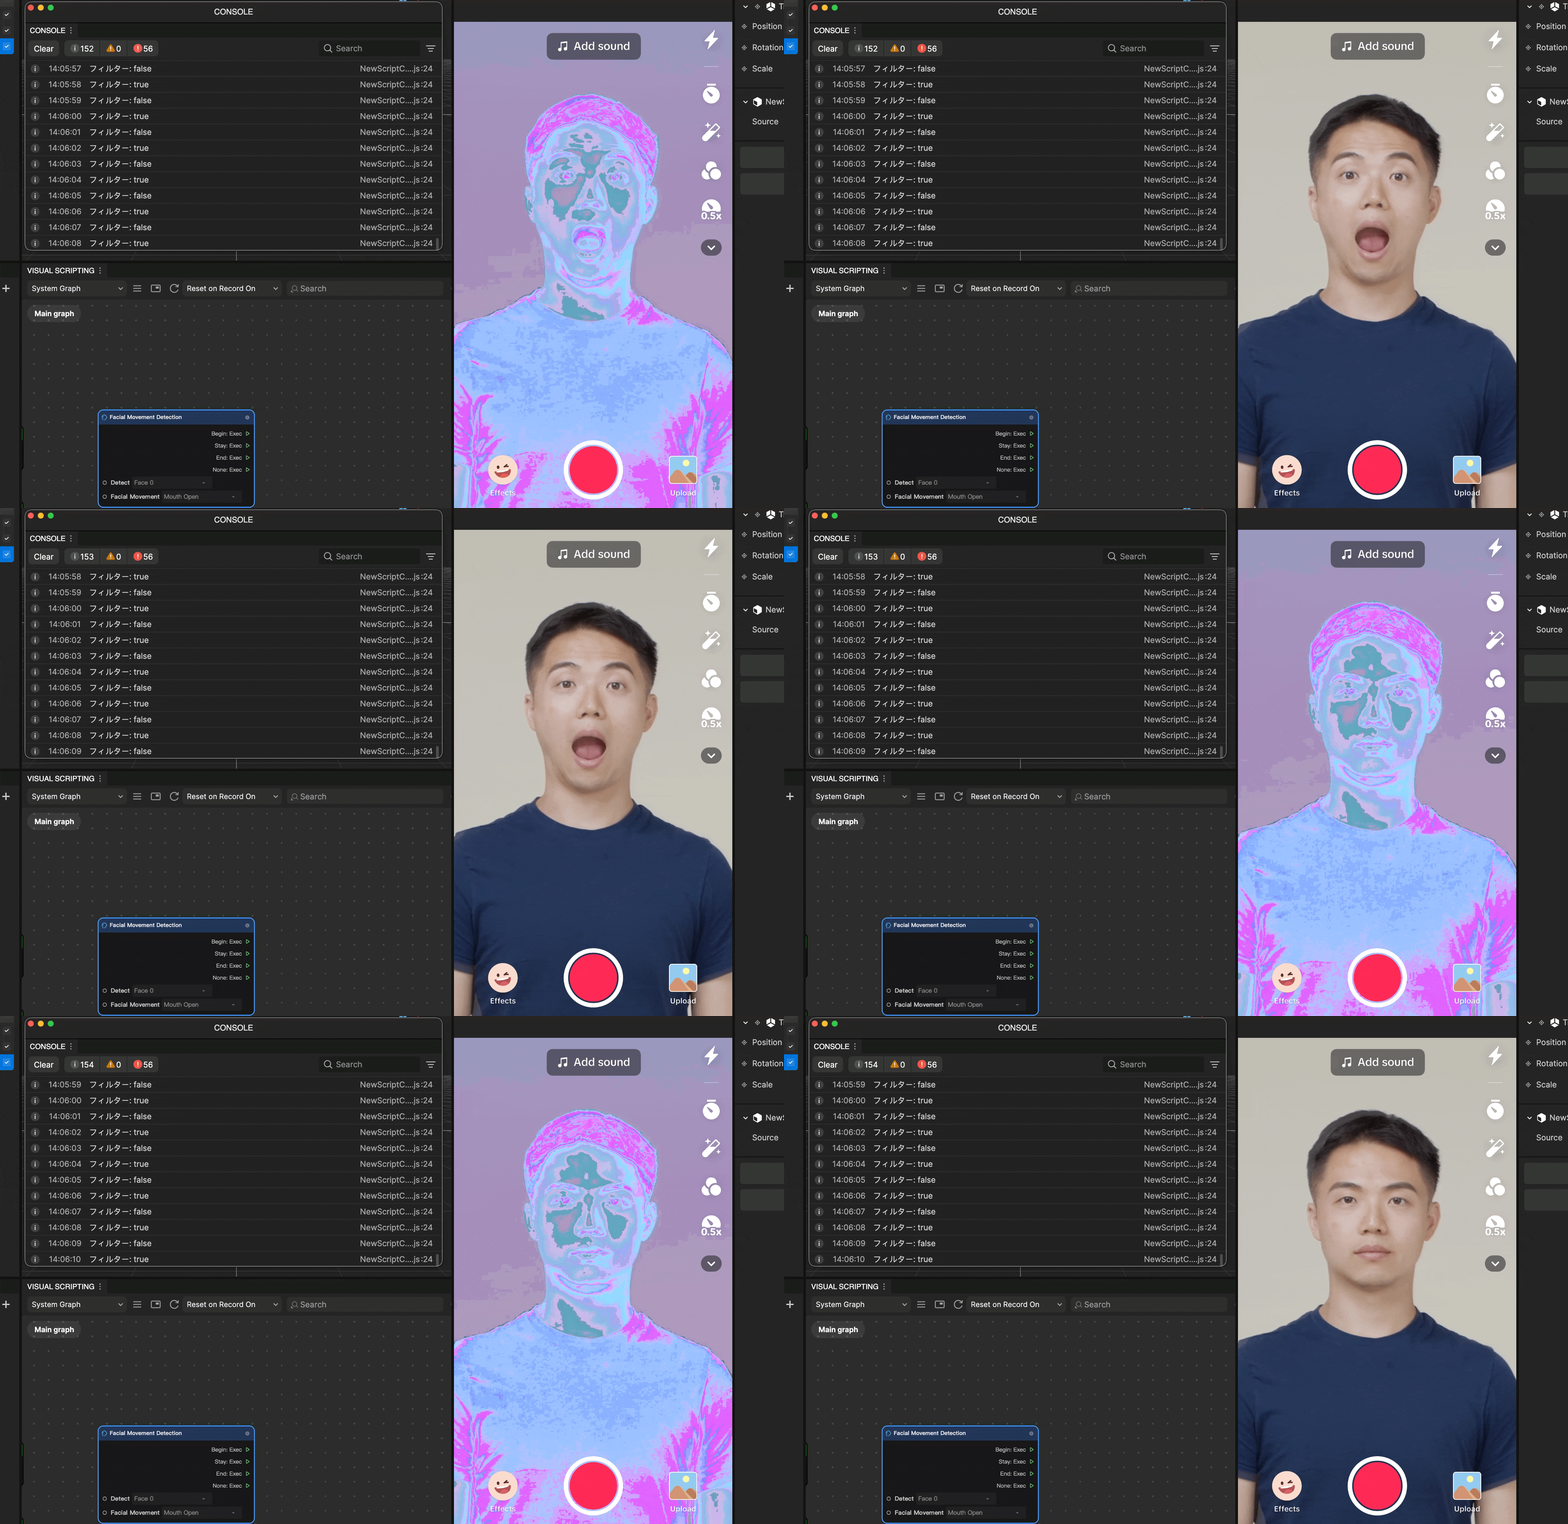
It looks like it flickers because I converted it to a GIF, but it’s working correctly.
Impressions from trying it out
Looking at samples made by creators, there are many interesting effects, like ones where part of the face changes or ones you can play as a game.
Whether it’s visual scripting where you just connect lines, or TypeScript where you can write logic in familiar syntax, I found the barrier to entry lower than I expected.
If it catches your interest, I think building just one first is the best shortcut to learning while having fun.